
It is possible to have an Epson PowerLite Projector display a split screen image of a Laptop Computer and a Document Camera (Doc Cam) at the same time.
Note: These instructions are specific to the Epson PowerLite99WH. The split screen option may not be available on earlier Epson PowerLite projector models. Also, split screen requires the computer to be connected to the Projector using an HDMI cable--it doesn't work if there are two VGA/computer connections.
1. Make sure the Laptop Computer is connected to the Projector via an HDMI cable. (For split screen to work, the computer cannot be connected directly to the Doc Cam.)
2. Make sure the Doc Cam is connected to the Projector via a VGA cable.
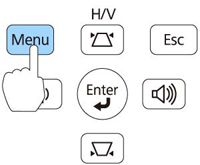
3. On the Projector, press the Menu button on the control panel.
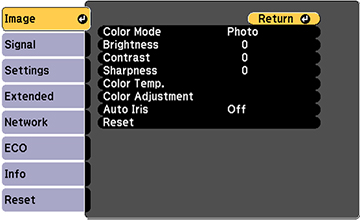
You will see the menu screen displaying the Image menu settings.
4. Use the Keystone up and down buttons (the Trapezoid shapes--they function as up and down arrows) to go down to the Settings menu listed on the left. Then press Enter. (This allows you to change settings in the displayed menu on the right.)
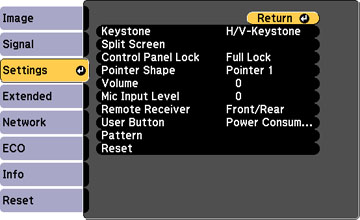
5. Use the Keystone up and down buttons to go down to Split Screen and press Enter to turn "Split Screen" on.
It will automatically detect the two connections and display them side by side.
Pressing Menu again gives additional options like: Screen size (equal, larger left, larger right), Swap Screens, and Exit Split Screen.
Pressing the Esc button will exit the menus.
Comments
0 comments
Please sign in to leave a comment.